Today I am going to show you a little step by step tutorial on how to make your OWN inserts for the clear-mount stamp set cases.
This is for those “older” stamp sets that you want to convert into clear-mounts and need a case with insert to identify… or for those that are still available in wood only *gasp*… same thing though – we want them in clear-mount and just do it ourselves!
You’ll need “My Digital Studio” and then just create a template to go back to for each “new” stamp set you need an insert for.
Oh by the way, this tutorial is not so little after all. So grab a chair, a cup of coffee or tea and maybe a snack… To see the measurements better, feel free to click on each photo when needed!
1) Open “My Digital Studio”
2) Create a new project (when naming your project, don’t use a specific stamp set, only use like “case insert” or something like that). Use the 8 1/2 by 11 portrait – from scratch…
3) Insert a square punch:

3) Change the size of the box to 5 3/4 by 1 (using the “handles” on the box).
Position the box so it will be at the very top:

4) Fill it with desired DSP:

5) Make pattern smaller if needed (double click on the box to do so). You may want to “lock” this DSP box (click on “edit” then select lock):

6) Insert a text box for the stamp set name. I used Font type Arial, Size 18. Position the box so that the beginning of the text is roughly at the 2” mark on the top and the 1/2” on the left ruler:

7) Insert another text box for the stamp set name, but for the spine of the box. (Font type Arial, Size 16):
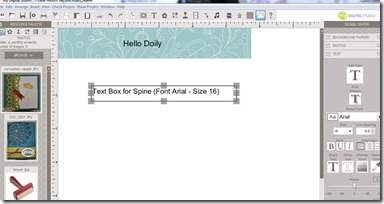
8) Now you’ll have to rotate the box. You can simple type 90 into the rotate box in the text column on the right:

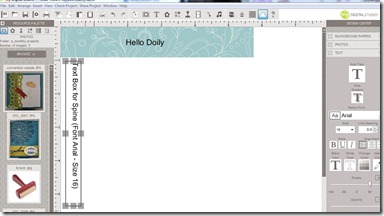
Once you hit enter, it will look like this:

9) Position the box so that the beginning of the text is roughly at the 1/2 ” mark on the top and the 1” on the left ruler:
10) Insert another text box for the dashed line on the bottom (Font type Arial, Size 12). Position the box so that the beginning of the text is roughly at the 3/4 ” mark on the top and the 6 1/2” on the left ruler:

11) Insert another text box with “Property of” Info (Font type Arial, Size 9). Position the box so that the beginning of the text is roughly at the 1” mark on the top and the 6 3/4” on the left ruler:

12) Insert another text box and type “Set of” (Font type Arial, Size 5). Position the box so that the beginning of the text is roughly at the 3 1/2” mark on the top and the 6 3/4” on the left ruler:

13) Insert another square punch

14) Double click on to to re-size it. You only need to change the width to 0.366 wide:

15) Change to color of the square, I used “Chocolate Chip”:

16) Position the box next to the “Property Of” Info. You may want to “lock” this box too:

17) Insert another text box and type “1” or how ever many stamps are in your stamp set(Font type Arial, Size 16 in color WHITE if on dark box). Center the text box over the square:
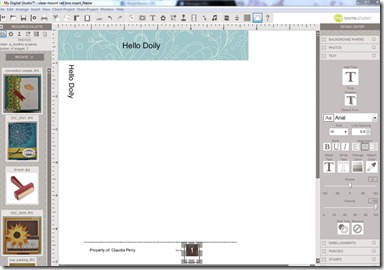
18) To print, click on “Share Project”, select “print”, yes to saving… Then select the project and click on “Page set up”. Here, try to change all of the margins to “0”. Your printer will have lowest preset number and most likely now just replace that number with the “0”. But we want the smalles possible border once printed.
19) Be sure to change the “Print Quality” to 100% if you want it to be crisp, then click “print”

20) Cut down your sheet so it will fit in the box. I trim off the top and left border first and then the rest so it will be approx. 7 by 5 1/2… Stamp your Images onto it and insert into box.
There you have it 
It really seems like a lot of steps, BUT keep in mind that you will do all of this only once. Then in the future, you’ll only change out the name of the set in 2 spots and the count of the stamps…
Also keep in mind the measurements that I gave you are approximately only. Try one out with what I gave you and make changes as YOU need them…
Have fun and let me know how it goes!