reminder

************************************************************************************************************************ Just a little reminder: I do use "retired" items in my projects so current customers can get inspired! You will notice that once you click on the listed items as they will not show up in my SU! store! ALL cards are now posted to Facebook only! So please be sure to click on the link below...

FB

Showing posts with label Markers. Show all posts

Monday, February 24, 2020

Good Morning Magnolia and Markers

Today's card is an example for using very limited supplies!


To get the water-colored look, I simply used markers in Calypso Coral, Pumpkin Pie, Garden Green and Early Espresso to apply ink onto the rubber stamp.... Then I spritzed the stamp with water and stamped it onto the shimmery white cardstock. I held the stamp in place a little... I then let it air dry.

The speckling was done with the Early Espresso marker by flicking the brush tip over the inside edge of the marker's cap


Product List


Thank you for stopping by!


Saturday, March 11, 2017

Window Box... a laser-cut card

Today I want to show you a card that I made in under 10 minutes, but you wouldn't think so I bet...
Here it is:


I knew I wanted to color the backside of the pretty cut-out but knew if I did that on the backside of the Vellum cardstock it might be to pale. So I cut a template first. put that down on some dark cardstock then put the Vellum Cardstock over it (I temporarily held it in place with dimensionals so it would not move on me), then colored in OVER top on the right side of the Vellum... using markers 


Once colored in, I put mini glue dots in the corners and adhered to the back of the layer that has the same image cut out


Oh and a little tip about this problem of the glue dots showing when used with Vellum cardstock, like here


I did place them strategically, so I could cover them up later with enamel dots ;-)

Supplies used:


Friday, June 17, 2016

Vertical Greetings

Yesterday I got a small batch of new toys in and could not wait to use a few of them on a card... Here it is:


GREAT TIP:
To make the coloring process easier, I simply inked up the whole topiary stamp with the Pear Pizzazz ink pad. Then I used markers in Island Indigo and Early Espresso to do the details. EASY!

Supplies used:


Sunday, October 4, 2015

Trick or Treat Tombstone

Today the weather is so dreary that it seemed perfect to make "dark" card. I created a tombstone with the ornate tag topper punch!


To make the tombstone stand out a little better, not only did I sponge the edges in black first but I also layered it onto white, well sort of... I punched a 2nd ornate tag topper shape but only used the shaped part on the top, pulled up some and added a thin strip on the bottom.. And I needed to cover up the hole in the top, so I simply added the little spider...

The greeting was inked up with markers in Elegant Eggplan, Old Olive and Pumpking Pie... And who can resist that gorgeous black glimmer paper and the fun spider web doilies?

I had fun making this card and hope it will inspire you to be spooky ;-)

Supplies used:

Built for Free Using: My Stampin Blog


Friday, October 2, 2015

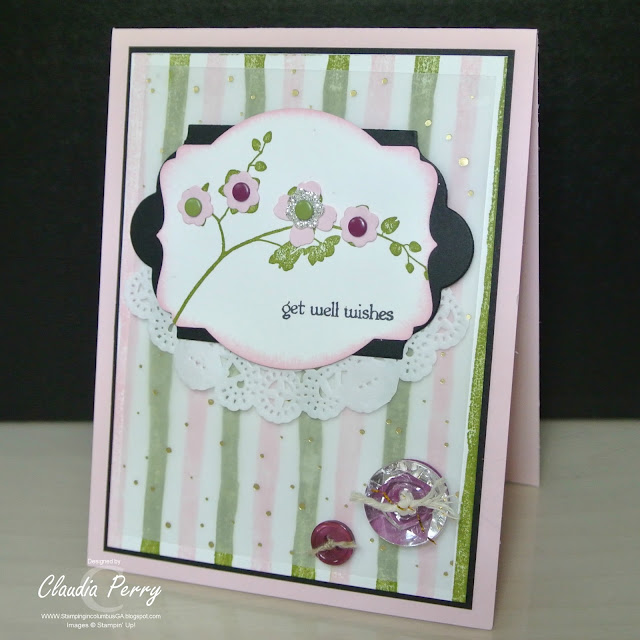
Get Well Wishes

Today I wanted to play with a "new to me" stamp a bit, it's called "Brushstrokes". I've used Markers in Old Olive and Pink Pirouette and colored the stripes on the rubber stamp, then huffed to re-moisten the stamp before stamping it on the white cardstock


While getting my greeting layers ready, I came across a piece of left-over vellum and decided to layer it over the stripes. For that I've used our new fine-tip glue pen and discovered that it works perfect for vellum. You can't see the glue when dry. YAY. That's a great bonus point!

Here is a close up, so you can see the gold specks and NOT see the glue ;-)


Supplies used:

Built for Free Using: My Stampin Blog


Thursday, June 4, 2015

You've Got This!

Not only do I like the catchy name of the new stamp set, but LOVE the set... it's simply Awwwwwhhhsome!

I was working with our white note cards the other day and had one handy on my desk that I had stamped with the cool background in the kit, but the color was too dark for what I wanted it for. So I had put it aside... Now it came handy!


I stamped the flower in VersaMark on Vellum CS and heat embossed it with Silver embossing powder. Reminder: Don't forget to apply the embossing buddy to the CS prior to stamping the image that you want to emboss. It will help tremendously with the stray powder!
Then I colored in the image with Blendabilities... but you can use the markers just as well for this!
Image was cut out then added the Wisteria Wonder CS and cut out again, so it would pop a little more...


Supplies used:


Built for Free Using: My Stampin Blog